Organize your Rails and AngularJS app with Lineman
Modern (edge) web applications tend to decouple client-side on the browser and server-side as cleanly as possible in order to reuse components for other types of clients (native mobile apps, third party applications and other systems). In this post we will share our way of organizing such a project.
In short, we wanted to find out what is the best way (it's our opinion here, there are many "best" ways) to carry out our development workflow using a Rails application as an API and an AngularJS application as a first-class JavaScript enabled frontend web app (pure browser-based client). We want:
- Well organized project structure.
- Totally decoupled Angular frontend from the Rails JSON API backend.
In our research we found a useful command line called Lineman, which is an utility based on Grunt that makes a basic structure of our client-side application and defines a simple workflow that can be customized. It also comes with cool advanced features one of which is api proxying, which allow us to integrate and switch with our server side app (our JSON API) forwarding any requests that it doesn't know how to respond to, to a proxy service.
Below, we will show you how to create a basic application to demonstrate the client-server communication of the Lineman-based Angular application with the Rails application backend (using nothing else but JSON) and we will pretend to log into the app with a simple fake authentication mechanism for demonstration purposes.
So let’s start coding!
Development environment
Pre-requisites
- Have Ruby installed (we are using Ruby 2.2.0)
- Have Rails installed (we are using Rails 4.1.9)
- Have NodeJS installed (we are using Node 0.10.32)
Let's get started by installing Lineman
npm install lineman -g
You can create a Lineman-based Angular application from scratch or use this AngularJS project template available on github which was created by David Mosher. This contains a basic Angular authentication app developed with Lineman. So, we will use this application in our example.
To start, we will create an application with rails:
rails new rails-angular-lineman-example
Then add the angular project from Github inside of this rails project, this will help us to next steps integrate with rails app and deploy easier:
cd rails-angular-lineman-example
git clone https://github.com/linemanjs/lineman-angular-template.git frontend
cd frontend
npm install
Project structure should look like this:
└── rails-angular-lineman-example
    ├── app
    ├── config
    ...
    ├── frontend  # our frontend/ folder, inside the Rails app
    ...
Setup your client-side app to use the api proxing feature that we talked about before by going into frontend/config/application.js, to configure your connection to the backend server (i.e. your Rails app) as follows:
//...
server: {
      pushState: false,
      apiProxy: {
        enabled: true,
        host: 'localhost',
        port: 3000,
      }
    }
//...
Also enable Lineman asset fingerprinting feature in this file, as follows:
//...
enableAssetFingerprint: true
//...
Moreover, the lineman-angular-template mocks the server-side by default (which is good for developing our application without any backend) but we are going to comment out all lines from frontend/config/server.js so that they do not override the connection to our local Rails server. Now, we will go to our Rails app code and add the "login" and "logout" routes and actions to demo the connection.
We will update, app/routes.rb as follows:
Rails.application.routes.draw do
  post 'login' => 'application#login'
  post 'logout' => 'application#logout'
end
We will add the corresponding actions to app/controllers/application_controller.rb file
class ApplicationController < ActionController::Base
  # Prevent CSRF attacks by raising an exception.
  # For APIs, you may want to use :null_session instead.
 protect_from_forgery with: :null_session # To simplify our demo

  def login
    render json: { message: 'logging in!' }
  end
  def logout
    render json:{ message: 'logging out!'}
  end
end
Notice that we put protect_from_forgery with: :null_session ( or just protect_from_forgery ) in order to empty the session on requests but doesn't reset it completely. We did this on purpose and on a later post we will show how to use basic token authentication for this.
Now back in our client-side app (which is inside the Rails app, under the "frontend" folder), notice that in frontend/app/js/router.js the AngularJS HTML5 mode is enabled, this means that Angular will use regular URLs in modern browsers and Hashbang urls in older ones (e.g. "localhost:8000/logout" instead of "localhost:8000/#/logout"). However, we want to only use Hashbang URLs to avoid raising routing errors in Rails when navigating directly to a url in the address bar of the browser. So, go to frontend/app/js/router.js and change the HTML5 mode to false or comment out the line (same effect) like this:
 //...
 $locationProvider.html5Mode({enabled:false});
 //...
Learn more about HTML5 Mode and Hashbang mode https://docs.angularjs.org/guide/$location.
Now, it's time to start our frontend app with Lineman:
lineman run
This command will run all development Grunt tasks to generate all the js, css and html files into the frontend/generated folder, also this command starts a server in port 8000 where you can check your application.
Finally, we start our rails server which just works as the JSON API for our app:
bundle exec rails server
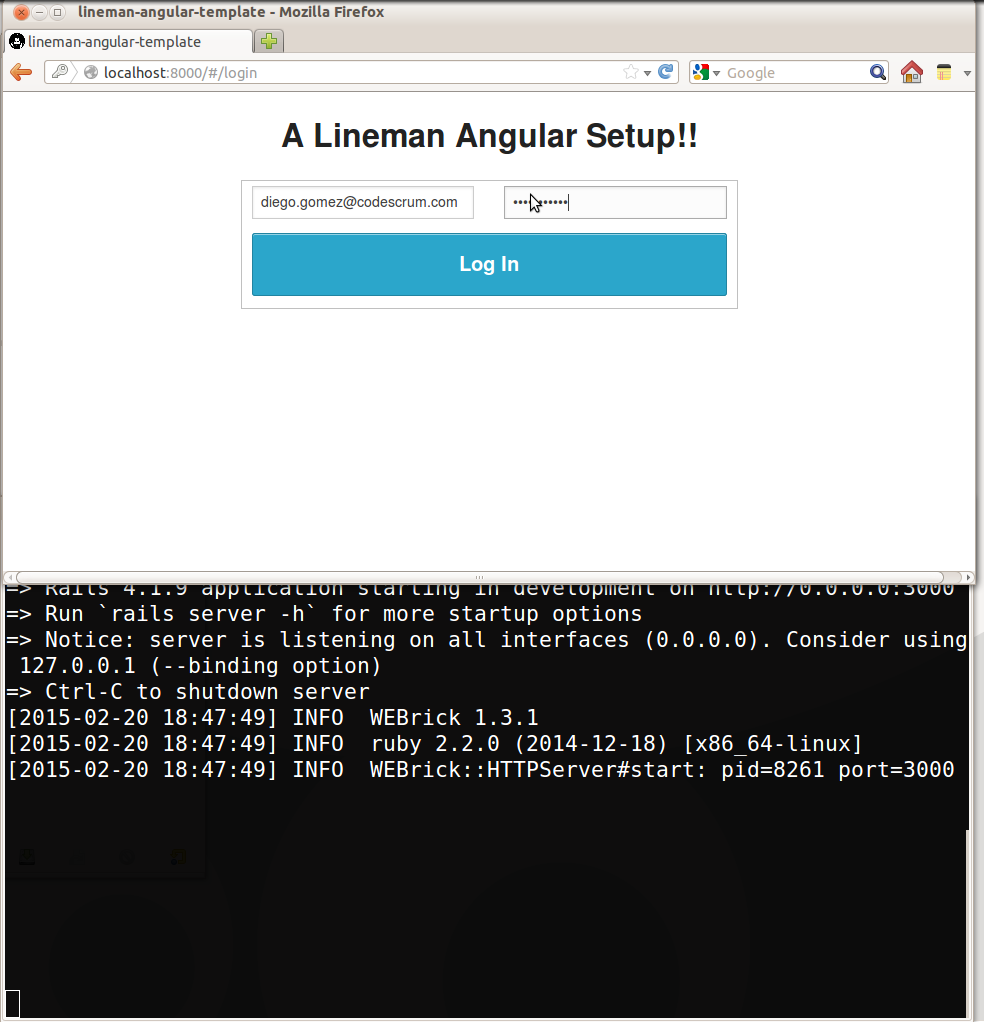
Go to localhost:8000. You can hit login and see how your client interacts with your Rails server for the "/login" and "/logout" routes.
And after logging in
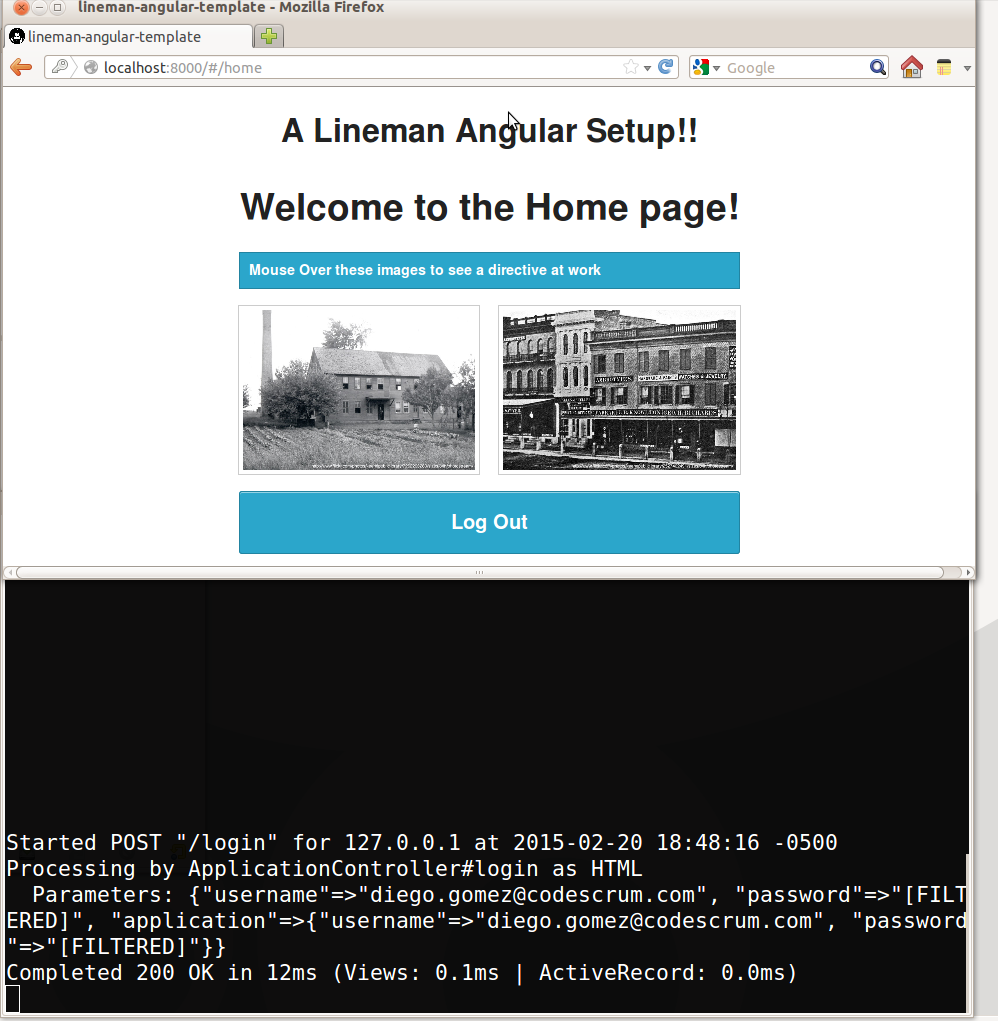 Cool! right?
Conclusion
Lineman offers one simple and useful way to organize our project and allow us to decouple our client and server side code. We can take advantage of the many features it provides.
In our next post we will show you how you can deploy our example to Heroku in an easy way. See you around!
Miguel Diaz
 Miguel works as technical director at CodeScrum - a company dedicated to creating user centric digital services and products. Miguel enjoys building web applications and services to help businesses improve and do their best.
Diego F. Gomez
 Diego is a Product Engineer at Codescrum - a company dedicated to creating user centric digital services and products. Diego always is exploring new ways to give better solutions and improve his skills.